Back in October last year, I was invited to speak to the 3rd and 4th year students at Swinburne University about Post Production Workflows (if you haven’t already, you can read about everything I discussed last time here). A couple of weeks ago I was invited back again to cover the same sort of thing with a whole new bunch of 3rd year students.
Not surprisingly, a fair bit has changed in the months between the lectures, so I thought it might be useful to document some of the new things I discussed on this blog. I’m obviously not going to go into as much detail as I did in the lecture, and in a lot of cases I will just provide links to other articles, rather than going through things step-by-step, but if you do have any questions, or if anything is unclear, just let me know!
One question that lots of students had was, when you’re shooting with cameras such as the RED or ARRI Alexa that shoot such big files (and generally speaking people end up shooting a lot more footage with digital formats than if they were shooting with film – just because they can) – what’s the best way to store all this media when you’re a poor student filmmaker?
Backing up and later ARCHIVING your media is incredibly important – as I’m sure everyone can appreciate. I know at least a handful of filmmakers who have COMPLETELY lost their films, simply because they didn’t have their files adequately backed up. One poor girl had two copies of the media stored in two completely separate locations – but purely due to bad luck (a house fire at her Mum’s house and a electrical storm at her Dad’s house), even that wasn’t enough. Gone are the days of having a tape backup of everything (so at least you can re-capture all your media if a drive dies) – now days almost everything is stored digitally on really cheap hard drives.
Recently, Sony in the UK had a massive fire due to the recent riots, and their whole warehouse got burnt down, with thousands of DVD all going up in smoke (have a read of Chris Jones blog if you haven’t already). If you had your master stored at this facility – you’d be pretty worried right about now!
Given these sorts of horror stories, we always recommend that you have THREE copies of your media, in TWO different locations (although, three would be better!), on at least TWO different formats. For example, in the professional world we normally have one or two LTO copies of all the camera originals for archiving purposes, and then also have it on three hard drives for easy access.
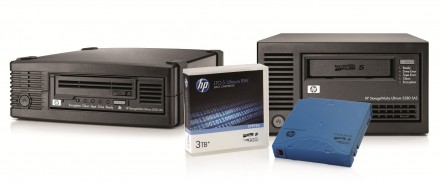
However, if you’re a poor film student, then archiving to LTO might not be a viable option.
An blank LTO5 tape will cost you around AUD$115.00, which has a native data capacity of 1.5 TB. If you’re shooting a short film to RED, then you may be able to get all your R3D files onto the one LTO – which isn’t that much compared to a hard drive. So if you can hunt down a production house that has an LTO deck you can use for a few hours, then that might be a really viable option. LTO’s a great, because as they are tape based, you can store them on a shelf and not worry about having to check them every few months (like you have to do with a hard drive – which are designed to be “spun up” every now and again).
If you were to buy an LTO deck for use on a MacPro it will cost you around:
ExpressSAS Card = $594.00
HP Ultrium 3000 SAS External Tape Drive LTO5 = $2,594.90
BRU PE Producers Edition for Mac OS X = $649.00
TOTAL: AUD$3837.00
Although not cheap – long term, it makes a lot of sense to archive to LTO as opposed to hard drives, so if you produce a lot of media, then it’s really worth the investment.
If you haven’t already, I highly recommend you download and have a good read through Silverado’s white paper on Archiving for Indies, as it covers this whole topic of LTO arching in great detail.
But assuming you don’t have any friends that have an LTO deck you can use – what’s the next best thing that’s affordable for students?
My suggestion would be to store all your CAMERA & AUDIO ORIGINALS (i.e. the R3D files or ProRes 4444 files) on THREE separate drives, stored at THREE separate locations. In terms of a student film, I would give one drive to the editor, one to the director, and one to the producer (assuming they’re not all the same people). You might even be able to store a drive at your University, just for good measure – or maybe you just leave a drive at your grandparents house in a top cupboard for the duration of the post production process.
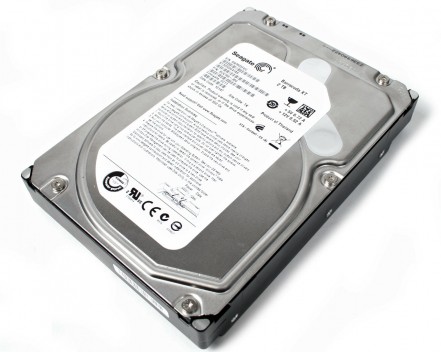
To keep things as cheap as possible, my suggestion would be to just use bare drives (i.e. drives without an enclosure). You can pick up a Seagate 500 GB drive for as little as $42.00, or a 1 TB drive for $59.00 – which is pretty incredibly cheap if you think back to how much drives costed only a few years ago. You can buy these drives from any computer reseller, however if you’re near the city – then somewhere like Computer & Parts Land (CPL) in West Melbourne is a great option – as they’re cheap, open long hours and they normally have heaps of drives in stock. There are also plenty of online resellers that sell these kinds of drives really cheaply.
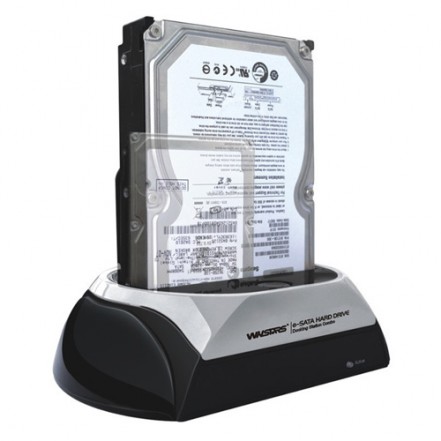
So how do you actually connect these drives to your computer? Luckily, there are heaps of different hard drive docking stations out there, so you have plenty of options – some that are really cheap, others that are built incredibly well, and cost a bit more money. For example, the product pictured above cost $29.00 from online reseller MacFixIt. There are plenty of options out there, including enclosures that have two bays (such as this one – $65 from CPL) – so it’s worth just doing a bit of Googling to see which enclosure is right for you.
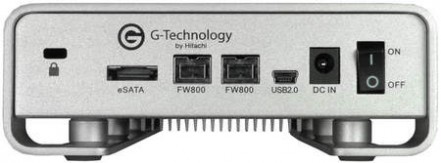
On this topic though – one very important thing to keep in mind BEFORE you purchase an enclosure is what kind of connection are you going to use? Given that you will be moving around very large chunks of data – the fastest connection you can get the better. If you’re lucky enough to have a new Apple laptop – then maybe a Thunderbolt drive is your best option. Thunderbolt I/O technology gives you two channels on the same connector with 10 Gbps of throughput in both directions meaning you can move data to and from peripherals up to 20 times faster than with USB 2.0 and up to 12 times faster than with FireWire 800. The only downside is that as the technology is new, only a few products exist on the market currently, and their expensive. The next best option is eSATA. If you have a MacPro, then you’ll either need to purchase a eSATA card ($65 from MacFixIt), or you can get a cable that actually connects to the motherboard of the Mac ($25 from MacFixIt) – or if you’re on a 17″ MacBook Pro, you can buy a ExpressCard with eSATA connections ($29 from CPL or MacFixIt). If you can’t afford to upgrade to eSATA – then you’re best bet is FireWire 800. FireWire 400 and USB are generally a bit too slow for throwing around lots of data – but if that’s all you’ve got then that’s all you’ve got. Basically – just go with the fastest option you can afford, and remember you’re only as fast as the weakest link (for example if you’re copying from a USB card reader to a Thunderbolt drive – the bottleneck will be the USB card reader).
So now you should have all your camera originals stored on three separate drives in three separate locations. But that’s really just the start. You now have to make media files which you’ll actually use for the offline process. If you’re shooting on RED, you might use REDCINE-X to transcode all the R3D files to ProRes or DNxHD – or if you’re shooting Alexa, you may just be working with the native ProRes files directly off the camera. I would recommend having two copies of all the offline material – one kept with the director and one with the editor (again, assuming they’re not the same person) – that way if you accidentally drop your drive the day before you need to export EDLs or OMFs – you can just jump straight back onto the backup drive. In a perfect world, it would be great to work off a RAID-protected (meaning, a Redundant Array of Independent or Inexpensive Disks) drive, as opposed to a standard drive for added protection. You can pick up two bay enclosures from as little as $149.00 from MacFixIt that allow you to run what’s called a RAID 1 – which basically mirrors the content from one drive to another. If you’re working with a huge amount of footage, then maybe a four-bay enclosure that supports RAID 5 (which means that if one of the four drives fails, then you can still re-build the information using the three other drives) would be a better option. If you want to learn more about how RAID protection works, there are plenty of resources out there on the Internet, such as this video.
Backing up the offline media to hard drives is really the only viable option. However, backing up project files from Final Cut Pro or Avid is a completely different story, as the files sizes are so small. As an added precaution, I would always keep multiple backups of your actual edit – just in case. How you do this is really up to you – maybe you can just store all your backups on a fairly large USB Stick (4 GB for $14.95 at MacFixIt – although sometimes you can buy even cheaper and bigger flash storage from places like Office Works), or you can backup your files to “the cloud” using services such as Dropbox, or any of the other cheap/free online storage services out there (of which there are many). Most universities offer some kind of storage on their servers as well – so that’s another good option for student filmmakers.
As usual – which workflow and backup procedure you use will come down to your budget. At the very least though, you should have three backups of your raw media ($59 x 3 = $177), and two copies of your offline material ($59 x 2 = $118) plus at least a couple of SATA docking stations ($65) – so you can really get everything working for under $400, which is a pretty good deal. Obviously storing your camera originals to LTO would be a much SAFER option – but when you’re a student, you have to work with what you can afford.
Below are some useful links to various sites around the Internet that are worth checking out on the topic of backing things up. I’m sure there’s plenty of other great sites out there, so if you have any favourites please share them in the comments!
Useful Articles:
- Anything worth backing up…
- My Personal Backup Routine
- How disaster proof are you?
- Archiving Dilemma
- Inexpensive Archiving for Tapeless Media
- How secure is your data? Do film makers create more data than most others…?
- Are you ready for a crash?
- DIGITAL DISASTER!
- Backup Overview
- Backup Tips – Prevent data loss with a good backup strategy
The other area that students wanted to learn more about what workflows for different digital formats.
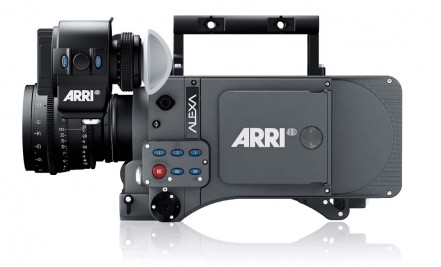
Unlike previous years, a lot of students this year are shooting on the ARRI Alexa (mainly because Swinburne now owns one). The Alexa is great, as the camera generates direct-to-edit ProRes media with embedded timecode and reel IDs, allowing you to basically instantly have access to the footage on Final Cut Pro or Avid (using AMA). These are self-contained files without a folder hierarchy to mess you up, like with P2 or XDCAM – you simply drag the ProRes files into the Final Cut Pro browser and away you go! In theory anyway. There are really only two things you need to keep in mind with the Alexa. If you shoot ProRes 4444, the file sizes are quite massive, and depending on your hard drive, what connection you’re using (i.e. Firewire 400, Firewire 800 or eSATA), and also how complex your edit is – you might find you get stuttered playback, or require a lot of renders. The solution – simply transcode all your footage to another variety of ProRes (i.e. ProRes LT or Proxy) and away you go! If you use Final Cut Pro or Compressor, the timecode and tape name will come across, so you’re good to go!
The other little gotcha is that you may be files are recorded using the ALEXA Log C profile (for more information on what Log C actually is check out this post). This yields a low-contrast, “flat” image designed to preserve dynamic range and offer optimum grading latitude. It’s a wonderful alternative to true camera raw recording, but adds a few considerations for post. A lot of editors won’t want to work with the low-contrast image, and although you could just apply a 3-way colour corrector to everything in the timeline in FCP – this is probably not the most fluid way of working (especially if you’re on a lower spec Mac). However – this is what we do in Avid – we just apply a colour corrector to the whole sequence, so that everything in the sequence has a “look” applied. But a much better (although more time consuming) option, is to “bake” the look in, so you don’t have to worry about long render times, as you add more effects to your edit. The easiest way to do this is documented here. Keep in mind though, that Nick Shaw’s plugin is no longer free – so you can either purchase it (it’s only USD$30), purchase the much more expensive Glue Tools ($799 – which is what we use at The Butchery, as it can handle ARRI RAW as well) or just use the 3-way Colour Corrector or a third party tool such as Colorista.
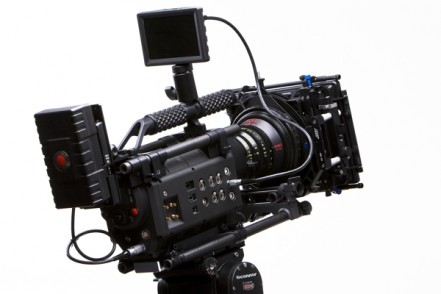
The RED One and EPIC have come along way in regards to post production workflows over the last few years. Although I personally never found the workflow too difficult, now-days you can basically just use the one application to transcode all your media for different NLEs. With the recent release of RCX-Pro, things are now even simpler, as the interface of REDCINE-X has basically just been “tweaked” to be much more user friendly and easy to manage. Basically, for Final Cut Pro, we recommend just converting everything to ProRes for the purposes of the offline edit. Later down the line, when you’re ready to grade – you can always go back to the original R3D files. Below is a really easy to follow video on how to convert all your RED rushes to ProRes using REDCINE-X:
And of course, Canon DLSR’s have taken over film schools like the plague!
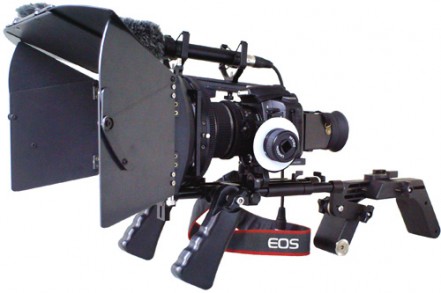
The Canon is great for low-budget filmmakers and students, because the gear is cheap enough that you can actually own it, the cameras are small so that you can put them in all kinds of wonderful places that a RED or Alexa could never reach, the image quality is incredible (considering the price and the compression used), plus you can make use of all the incredible stills lenses out there. But of course, there are gotchas – the camera records to H264, it doesn’t record timecode, amongst many other things (i.e. when recording for long periods, especially in warmer climates, increased video noise may occur due to CMOS overheating – but let’s just focus on post for now). If you’re just planning to edit and FINISH in Final Cut Pro, then you don’t need to worry too much – just transcode all your footage to ProRes and way you go. However, if you plan to do an offline/online workflow – then you are going to need reel names and timecode. Although there are a few different ways you can do this, the method we recommend is as follows:
1. Duplicate all your camera originals as a safety (although you should already have three backups anyway!)
2. Use something like Name Mangler (US$10 on the App Store) to batch rename all your rushes to something a bit easier to keep track of (i.e. MVI_0021 becomes AD1R1S01 – A camera, day one, reel one, shot 1). This become really important if you’re shooting with multiple cameras over many days (i.e. documentaries), as you don’t really want duplicate file names, as it will just complicate things later down the line.
3. Once everything is named correctly, you can apply timecode to the clips. We use a program called QTChange (US$24.95) to add new timecode and a reel name to each clip. Although there are a few different ways to tackle timecode (i.e. you could just use Time of Day – based off the date information from the camera) – but we just normally set the hour mark, to the shoot day (i.e. day one begins at 01:00:00:00, day two begins at 02:00:00:00, etc.).
4. Now that you have nicely named, timecoded masters, you can now create ProRes files! There are many different tools out there that allow you to do this, but just make sure you use a tool (i.e. Apple’s Compressor) that RETAINS all the timecode and reel information. However, if you do accidentally use a tool that doesn’t bring the timecode and reel information across, you can always use QTChange again.
It’s also worth checking out 3rd party tools like Magic Bullet Grinder – although with Grinder, although it’s great for jobs where you are just finishing everything in Final Cut Pro, as it doesn’t add reel-names automatically to clips – so if you think you’ll need to export EDLs, then you would have to manually enter all the reel names within FCP, which can be a bit of a nightmare – or use QTChange. As with everything – make sure you do some workflow tests before you commit to a piece of software, as Grinder is constantly being updated and revised.
Hope this helps! As always, if you have any further questions, or if any of the above is incorrect or unclear – just let me know!
Onwards & Upwards!
Chris!