Last week I had the pleasure of being invited to Swinburne University to speak to 3rd and 4th year students studying towards their Bachelor of Film & Television in Prahran. I’ve had a couple of requests already to share some of the slides from the presentation, so I thought I might as well put together some useful resources to sum up what I discussed, and share them with world via this blog! So instead of just sitting in front of your computer or mobile device reading this – imagine that you’re a student in a university class room. The only difference is that instead of being able to just yell out questions (of which we had some really great questions when I did the talk!), you’ll have to just submit a comment at the bottom of this page and I will get back to you. Please keep in mind that this was only a short introduction to the world of post production, so I won’t be going into so much detail in regards to all the technical things – consider it a quick overview. I have however included a stack of really useful links at the end of the post, so you can continue your learning… Enjoy!
Hello, my name is Chris Hocking and I am here to talk to you today about Post Production workflows, and the role of the Assistant Editor in a professional postproduction facility. Before I get stuck into it, I thought I’d better give you some background into how I got started in the industry.
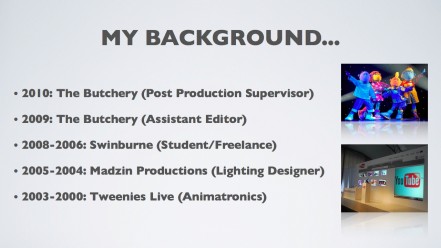
I’ve been working in the entertainment industry for 11 years now - starting off in the animatronics department for a BBC Kids show, Tweenies Live. After touring around Australia and the UK with the Tweenies, after I finished high school I started work in concert lighting and production management, based in Melbourne, but spending most of my time in Sydney with the occasional trips overseas and lots of trips around Australia. After two years of working essentially 24/7, I decided I needed a break from the crazy hours of live productions, and submitted my application for Swinburne Film & TV (little did I know at the time, that I would be working basically the same hours in Film & TV!). Like you guys (or at least like the people I originally designed this presentation for), I studied towards a Batchelor of Film & Television, and finished up in 2008 - still doing lots of freelance lighting and film jobs whilst studying. Last year, I got a job as the Assistant Editor at The Butchery, and this year after travelling overseas for the first half of the year; I’m now back at The Butchery as the Post Production Supervisor. What does that mean exactly? I am responsible for implementing effective workflows across the whole facility, training up new staff, maintaining the phones and servers, developing relationships with other post houses, testing new software and hardware, etc.
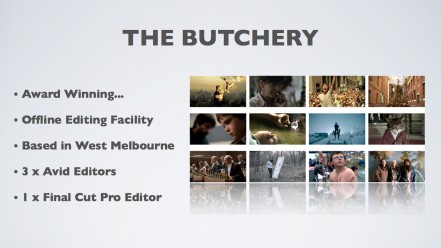
For those that don’t know, The Butchery is a boutique offline editorial company that mainly focuses their attention to commercials and film work. Created as an antidote to the “all in one package” of many modern day post production houses, The Butchery instead focuses it’s attention solely to the art and practicalities of film editing.
The company is based in West Melbourne, spanning across two beautiful terrace houses. There are four full time editors at the facility (three of them cutting on Avid, and one on Final Cut Pro), a facilities manager (who also studied at Swinburne with me), an office manager, one full time assistant, two part time assistants and myself.
If we have a look at The Butchery website you can see that we mainly do some of the more creative, and higher-end commercials, such as some of the big beer ads, some of the big car companies, major softdrink companies such as Coke and Schweppes, government companies such as Worksafe, yummy companies like Cadbury, just to name a few. Jack has also cut two feature films, Last Ride and Bastardy - and Peter is currently working on a feature film called Hail. All of the editors also do short films and video clips whenever they can fit them in - and we’ve cut several award winning short films such as Cracker Bag, Nature’s Way and Jerrycan.
For the next little while, I am going walk you through a typical commercial job from beginning to end. The reason I’m going to focus on commercials, as opposed to feature films, is that in reality, if you’re going to be an editor or assistant editor, most of your income is going to come from commercials. Feature films are great - and you really get to flex your creative muscles, however they take a year or more of your life, plus they don’t draw as much cash as a year’s worth of commercials would in comparison. The technology is basically all the same for both types of jobs - it’s really just the deadlines are longer for longer form projects, and instead of having agencies like you would in commercials, you have studios and investors to keep happy.
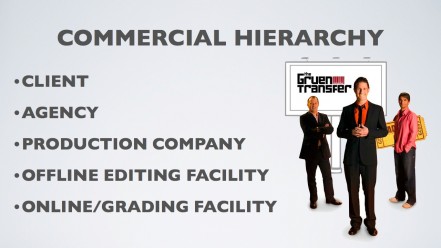
There are several different parties involved with every commercial. Essentially, a client decides they want an advertisement for their company or product. For example, Coke might be releasing a new energy drink. They will employ an agency to come up with a cool concept for an advertising campaign - for example, they might decide to do a commercial where there are a whole lot of skateboarders on fire. The agency will then hire a director they really like. Most commercial directors in Australia work for a particular production company, such as a directors collective like Exit Films, although there are some freelance directors out there that employ producers on a job-by-job basis. Production companies will normally pitch for the project, and the agency will decide which director/company is best suited for the project. Once the director is on board, he or she will then get in touch with their preferred editor for the project. Assuming all the dates work out, if all parties are happy, the job will then go ahead.
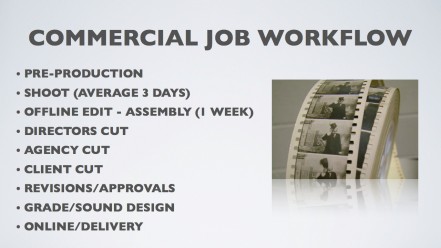
Before I get into the specifics - I just want to give you a quick overview of what is involved on your average commercial. Generally speaking, the production company normally spends three days shooting the commercial - although this obviously depends on the complexity and nature of the spot. Some shoots go for 2 weeks for a 30sec spot; others only take a few hours to shoot. Once we receive rushes, the editor normally has about a week to start going through all the footage, making selects and putting together an assembly cut. Once they are in a good position, the director will come in and work with them. Normally the director and the editor have a couple of days to come up with something to present to the agency. The agency will then make suggestions, and everything will go back and forth until everyone is happy (or in some cases, until they run out of time!). The agency will then present the cuts to the client. If the client is happy, then that’s a job well done - if not, they will keep going back and forth until they are. Once the client approves the cut, the editors job is now over, and the assistant much prepare EDLs and OMFs for the online/grade and sound design. I will explain EDLs and OMFs in more detail shortly…
For anyone here who really wants to get into the world of postproduction, whether you want to work in visual effects, editing or post producing, one of the best ways to start out is an assistant editor. Although it’s an entry-level job - it’s certainly one of the most important roles in the postproduction process, and is a great stepping-stone to bigger and better things. That said, I know plenty of people who have made a whole career out of being an assistant editor, so it’s not necessarily a job that you have to grow out of.
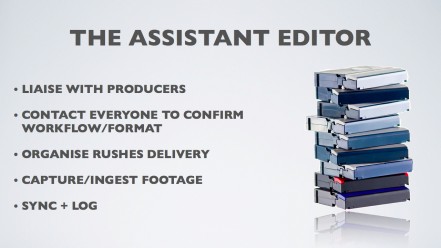
So what exactly does an assistant editor actually do on your average commercial production? Well, if we start at the beginnings of a new job, the assistant will liaise with the post producer and the producer at the production company and make sure that everyone is on the same page. They will discuss formats and workflows. If the job is to be shot on film, they will normally get in touch with whoever is doing the telecine and the online, to make sure that everyone is on the same page. If the spot relies heavily on visual effects, then all the specifics need to be worked out now, so that there are no surprises later down the line. The assistant may also have to contact sound recordists and camera assistants just to double check settings. Basically - it’s the assistant’s job to make sure that when the editor eventually sits down in front of his computer, everything is in the right format, and everything just works. One of the most important documents at this stage is the specs sheet. This is a list of all the requirements that the offline facility needs in terms of tape formats, Quicktime settings, sound recording settings, etc.
Between the post producer and the assistant, all the scheduling details need to be worked out, such as when rushes will be received, and work out how long it will take to ingest and log all the footage, so that the editors knows when to come in.
Once all this has been confirmed, not much else needs to be done until the rushes arrive. Depending on the format, the rushes will arrive in a variety of different ways.
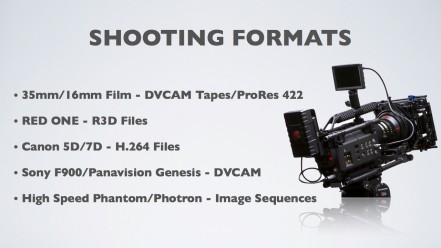
Most film jobs (whether they be 16mm or 35mm) that are being shot in Australia will be telecined to DVCAM, and then delivered to us. If the job is being shot overseas, the tapes will either be couriered or the telecine facility will send us the files via an FTP server. Although technically, most facilities have the ability to telecine the footage straight to ProRes or DNxHD files, this rarely happens.
All jobs shot on the RED ONE are normally delivered on an external hard drive containing all the R3D files. We then use the free RedCineX software to convert the files to ProRes (for Final Cut Pro) or DNxHD (for Avid).
All jobs shot on cameras like the F900 or Panavision Genesis, which shoot to HDCAM are transferred to DVCAM for the offline. Some of the bigger offline editing companies have HDCAM decks – however, given the huge costs of these decks, a lot of the newer offline facilities have chosen to go with more file-based workflows.
All jobs shot on high-speed cameras, such as the Phantom and Photron are supplied to us on hard drive as images sequences (normally TIFFs or DPX’s). We then wrap these files in Quicktime Movies for ingestion into Final Cut Pro or Avid.
Almost every single job that has synced sound is recorded separately to the vision. That means that it needs to be synced manually using a slate. Sometime’s you’re lucky and they use a smart slate (which has timecode), so you can easily sync things quite quickly. Other times the clapper loader forgets to slate shots, or they use an iPhone app, which fails, etc. Although there are easy ways to sync cameras to audio recorders using timecode - in the real world, most of the time, they don’t do it.
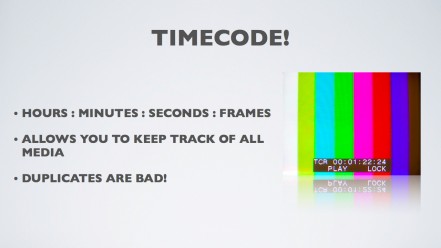
One of the most important things to get your head around as an assistant editor is timecode. In theory, each frame of video on a project should have its own unique timecode reference. This is the one bit of metadata that allows you to easily track individual frames. Timecode is the glue that helps us get from offline to online via EDLs and XMLs.
With film workflows - keeping track of timecode is relatively easy. When the footage is telecined to tape, the tape is striped with a timecode track. Generally speaking, roll one starts at the one-hour mark, roll two at the two-hour mark, etc. This timecode reference allows you to easily scan the required film frames in future, just with an EDL reference.
However, new cameras like the Canon 5D and 7D don’t record timecode, which makes traditional workflows a bit more tricky. Generally speaking, we normally add a timecode track to the individual H.264 files so that we can easily track each frame of footage.
TIP! You can use Qtchange to add timecode metadata to Quicktime files.
One you have received the rushes, the first job is to get them into your NLE - whether it be Avid or Final Cut Pro. Although each editor has their own way of working, we generally set up projects exactly the same way.
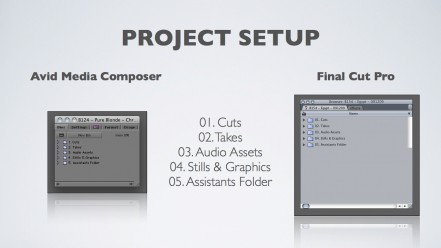
In Final Cut Pro we create bins that following the syntax you see on the screen, and in Avid we create folders, which do exactly the same thing.
- The Cuts Folder contains all the actual edits and selects.
- The Takes Folder contains all the actual takes, in the form of subclips
- The Audio Assets contains any music or sound effects used
- The Stills & Graphics folder contains any stills or graphics!
- The Assistants Folder contains the raw rushes, EDL exports, DVD exports, OMF exports, etc.
Once you’ve set up this structure it’s then just a matter of importing or capturing the footage, then syncing and sub-clipping as required.
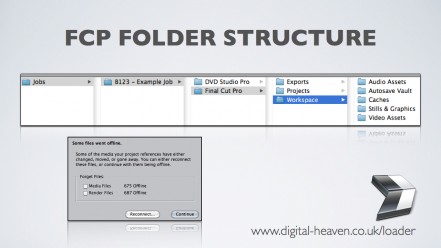
One of the biggest issues with FCP is media management. One of its biggest attributes (being able to throw anything into it from anywhere) is also one of its biggest floors. It’s so easy to just drag in an MP3 from your iPod - but life gets a lot more difficult if you’re moving around to different suites a lot, especially when you’re studying here. The solution? You need a rock solid folder structure. This is what I recommend.
It’s also very important that you don’t just drag anything into Final Cut Pro. Never drag in MP3s - always convert them to 48kHz 16-bit AIFFs. Loader is a great 3rd party app that helps with this.
Generally speaking, apart from DV tapes, we convert everything to ProRes 422 for offline editing in Final Cut Pro (and DNxHD 36).
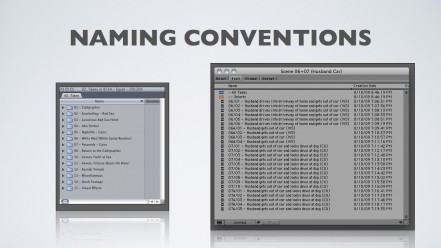
Naming conventions vary from project to project, but generally speaking, we normally use the following format:
01/01/01 - Description, description (WS)
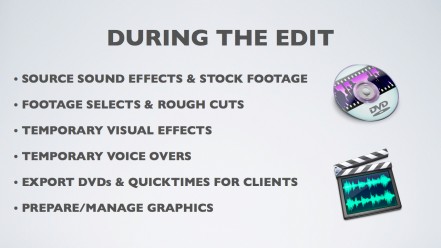
Once everything is into Final Cut Pro or Avid, all synced and sub-clipped. The editor can begin cutting. Whilst the editor is doing his or her thing, the assistant may be required to source sound effects and stock footage, do selects, create temporary visual effects, record temporary voice over’s, export DVDs and Quicktimes for Client Review, manage graphics, and even occasionally complete rough cuts of the edits to speed up the process for the editor.
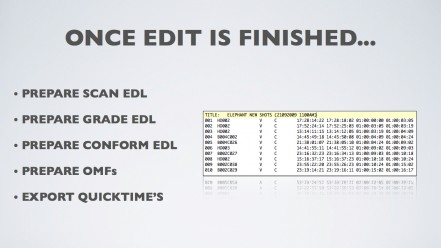
Once the offline edit is complete, it is time to get everything ready for the online. The way we do this is export out an EDL (edit decision list). An EDL is a way of representing a film or video edit. It contains an ordered list of reel and timecode data representing where each video clip can be obtained in order to conform the final cut.
At the end of the offline edit process, we provide post production houses (such as Digital Pictures and Complete Post) EDLs so that they can work out which shots need to be scanned, graded and conformed. We basically use them as a tool to communicate with other posts houses systems to explain exact what frames of footage we are talking about (using timecode as our common “language”).
Types of EDLs:
Scan EDL
This EDL contains all the shots that are used in a job. If there are multiple versions of a commercial (i.e. a 60sec cut, 30sec cut, 15sec cut and 10sec billboards), then this EDL should contain EVERY clip that is included in all of the cuts, but should not include duplicates. Any visual effects background plates, extra passes, green screen shots, etc. should also be included in this EDL. They don’t have to be in any particular order. The online house will use this EDL as a reference of what shots need to be rescanned at high resolution for the final colour grade and conform. The EDLs timecode should start at 01:01:30:00 and there should not be any black gaps between clips. This EDL should not contain any effects, graphics or transitions. This EDL should be sorted by C-Mode (also referred to as “Source” in Final Cut Pro).
Grade EDL
This EDL contains all the shots that are used in a job, in order of the various edits, and can include duplicates. For example, if you have a big impressive dolly shot that opens at the start of the 60sec cut and then again in the 90sec cut, it will appear twice in the EDL. The EDL should start 01:01:30:00. Each new cut should also start on a 30sec mark (i.e. 01:02:30:00). At the end of the EDL, also on a 30sec mark should be any visual effects elements that were included in the Scan EDL. This EDL should not contain any effects, graphics or transitions. This EDL should be sorted by A-Mode (also referred to as “Master” in Final Cut Pro). This EDL is used to grade all of the footage. It is laid out in this particular way so that the colour grade can be viewed in context to the edit.
Conform EDL
For each cut you do (i.e. 60sec, 90sec, 30sec), you will need to export an individual EDL for each track/layer. For example, if you have three different edits - you will need three different “sets” of EDLs. If each EDL has two layers/tracks, then you will end up with nine EDLs in total. The conform EDL should contain all effects, graphics, speed changes and transitions. Each EDL should start at the same timecode point as per the grade EDL (i.e. the first cut will start on 01:01:30:00, the second might start on 01:02:30:00, etc.). This EDL should be sorted by A-Mode (also referred to as “Master” in Final Cut Pro). This EDL will be used by the online artist to essentially “recreate” the edits as they appeared in the offline edit, however they will now link to the newly graded footage and any updated effects shots. Any speed effects and transitions will also be reapplied at full resolution.
Useful Documents:
- How to export an EDL from Avid Media Composer (PDF)
- How to export an EDL from Final Cut Pro (PDF)
- How to export an OMF from Avid Media Composer
- How to export an OMF from Final Cut Pro
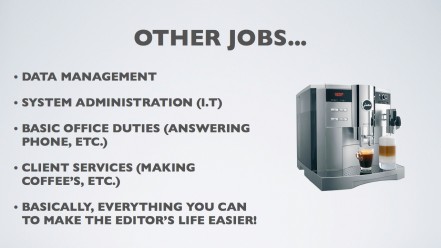
In addition to all the technical editing jobs, as an assistant editor you may also be expected to do:
- Data Management (backing up office computers, etc.)
- System Administration (making sure all the computers work!)
- Basic Office Duties (photocopying, answering phones, printing, organising couriers, etc.)
- Client Services (i.e. making coffees!)
- Basically, anything you can to make the editors life easier!
At the end of the day the assistant editors job is to ASSIST the editor. They must do whatever it takes to make the editors life fun, enjoyable and as easy as possible. The editors job is to edit a series of images into something that tells a story – you need to make sure the editor can do their job and are not distracted by anything else.
Useful Articles:
- A Look at Careers in Editing
- Starting out in Post Production
- Getting a job as an assistant editor (make sure you read the comments as well!)
- What is the Real Relationship of Editors and Their Assistants?
- What does a Brand Manager actually do?
As Swinburne students you are very lucky to get free access to Screen Hub. Make sure you make the most of this! Currently, there are lots of really interesting post production jobs out there, so it’s well worth having a look!
This concludes my little talk about the world of post production. Unfortunately, if you didn’t catch the lecture in person, you have missed all the stuff I showed off on Final Cut Pro and Avid, however, there are plenty of websites around that will help you continue your learning. Also, remember to download a free trial of Avid Media Composer so that you can have a play!
Where can I get help & support for Final Cut Studio?
Luckily for you there are heaps of fantastic resources out there to help you with Final Cut Studio!
First off, there’s always Apple.
http://www.apple.com/support/finalcutpro/
Secondly, one of the very best places to get support for anything technical is The Digital Video Information Network. It’s an incredibly professional forum, full of industry professionals and young up-and-coming gurus. In most cases, a quick search of the site and you’ll found your answer. However, if a search returns nothing, you can always post your question and within no-time you’ll receive a quick and helpful response. We can’t recommend this site enough!
http://www.dvinfo.net/conf/login.php
But, if you’re not a fan of forums, here are some other great alternatives:
Ken Stone’s Final Cut Pro Tutorials website is one of the best sites out there for Final Cut Studio information. It really contains a wealth of information from a range of fantastic authors on all kinds of things!
http://kenstone.net/fcp_homepage/fcp_homepage_index/
Moviola Digital Education Center is committed to providing useful information, both in the classroom and out. Here you’ll find a lot of useful information related to Final Cut Pro, and other Final Cut Studio applications. In addition to custom tips and tutorials, you’ll find downloads relevant to Final Cut Studio, troubleshooting resources, and we’ve also scoured the Internet for other helpful information.
http://edu.moviola.com/rc_final_cut_studio_main
DMN Final Cut Pro Channel has some really useful tutorials.
http://finalcutpro.digitalmedianet.com/
FCP Hot Tips Podcast: Every month, Apple certified trainer Martin Baker shows a hot tip for Final Cut Pro to save time and make your editing life easier.
http://www.digital-heaven.co.uk/podcast/
LAFCPUG: Offers extensive resources, articles and information for Final Cut Pro.
http://www.lafcpug.org/
LarryJordan.biz: Final Cut Pro articles and info.
http://www.larryjordan.biz/
Proapptips.com: Pro App Tips are short tips about for the Apple PRO series of video production programs.
http://www.proapptips.com/
SFCutters.org: The world’s first FCP User Group in San Francisco.
http://www.sfcutters.org/pages/articles.htm
Yahoo! Groups: Final Cut Pro discussion groups.
http://dir.groups.yahoo.com/dir/1603568771
Final Cut Studio Planet: Tips and News Blog.
http://dvcreators.net/finalcutstudioplanet/
Creative COW: Final Cut Pro discussion, articles and tutorials.
http://forums.creativecow.net/index/
Avid Resources:
- Avid Media Composer 5 Getting Started Training
- Freddy’s Big List of Relevant Avid Links (links to everything you can ever imagine!)
- Avid Tech Tips (a collection of very useful tips, tricks and workflows!)
- The Changeover Challenge: From Avid to Final Cut Pro
- Comparing the Log and Capture tools in Avid and Final Cut Pro
- Avid Screencast (lots of useful free Avid tutorials!)
- Avid Tips
Great Videos:
Useful Articles:
- Canon 5D/7D Workflow Papers
- Organising Tips for Final Cut Pro
- Handy Scripts for Final Cut Pro
- Keeping Your Final Cut Pro Project Organised
- 10 Things Every Final Cut Pro User Should Know
- Everything you ever wanted to know about 24p and NTSC
Helpful Blogs:
- Alex 4D
- ProVideo Coalition
- GeniusDV
- FCP Daily
- Little Frog in HD
- Chris Jones Blog
- Avid 2 FCP
- Thrillcat Editorial
- Finalcutters
- Editing Standards
- Splice Here
- View from the Cutting Room Floor
- ACE Members Tech Web Discussion
- Film Industry Bloggers
Recommended Podcasts:
- RED Centre
- This Week in Media
- This Week in Photography
- Stories from The Edit Bay
- The Terence & Philip Show
- This Week in Tech
- The Production Office
- fxguide & fxguide tv
…and finally, if you’re a Twitter user, make sure you follow us, and also all of these fantastic people and companies. We hope you have found this blog post interesting and helpful! If you have any questions or if you require any further information or assistance, please don’t hesitate to leave a comment!
Onwards & Upwards!
Best Regards, Chris!
